Night sky using distress inks
Trees stamped on background
Image made from die cuts
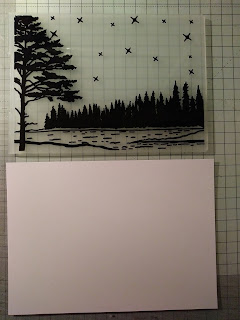
Background image and trees from embossing folders.
Night Sky
Using distress inks to make a starry night sky .
Randomly ink white card with green, purple and bluish distress inks. Ensure you completely cover the card.
Cover the colours with a coating of black soot distress ink. The more black you apply the darker the sky. You can layer the coloured ink on top of the black and then add more black for a richer deeper effect.
Once you are happy with the depth of colour and darkness allow to dry. Once dry spray the card with a water spritzer. Press a paper towel over the card to remove the water drops. This causes a faux bleaching effect and removes some of the colour from the card where the water drop weregiving a splatter effect which hopefully looks like stars or planets in the sky.

As well as using a water spritzer a starry effect can also be acheived using splatters of white paint or using glitter or metallic spritzers. I have added all three to my sky.
I used a silvery purple spritzer on this card. Once dry I stamped trees in the background. I think if I were to do this again with stamps I would make the sky a bit lighter so the stamped images show up better. I added a die cut stag and a sentiment to make a card.
I used a gold spritzer on this sky. I used die cut images for the tree and wolf. I glued two layers of the images cut from black card together and then layered these on top of another image cut from white card. The white card is very slightly off set to provide a highlight. Layering the die cuts gives more depth to the image and I think it looks more effective. I used gold gilding wax on the top layer of the black card. Gold embossing powder was used on a sentiment stamped with versafine ink.
For the next sky I used a piece of card cut to the size of an embossing folder which had the image on I wanted to use.
For this sky I used purple, pink and greeny blue distress inks to cover the area on the card where the sky will be when embossed. These were then covered with a layer of black soot and grey which gave a lighter sky with the colours being brighter. I think this resulted in a more Northern Lights look.
The bottom bit which I thought looked like a river or lake was coloured with a blue distress ink.
I added white paint splats for stars using watered down acrylic paint.
I then positioned the card in the embossing folder so the sky and water lined up and then embossed it by running it through my die cutting machine using the embossing plates.
I used a flat sponge to highlight the raised embossed areas using a dark green distress ink.
I then used a silver gilding paste to add highlights to the tree tops and ripples on the water. I darkened what I thought was a little island or spit of land running into the water with the dark green and black distress ink. I added a die cut stag and a sentiment to make a card.


Comments
Post a Comment